mirror of
https://github.com/netdata/netdata.git
synced 2025-04-26 05:47:20 +00:00
140 lines
5.7 KiB
Markdown
140 lines
5.7 KiB
Markdown
<!--
|
|
---
|
|
title: "Monitor Unbound DNS servers with Netdata"
|
|
date: 2020-03-31
|
|
custom_edit_url: https://github.com/netdata/netdata/edit/master/docs/tutorials/collect-unbound-metrics.md
|
|
---
|
|
-->
|
|
|
|
# Monitor Unbound DNS servers with Netdata
|
|
|
|
[Unbound](https://nlnetlabs.nl/projects/unbound/about/) is a "validating, recursive, caching DNS resolver" from NLNet
|
|
Labs. In v1.19 of Netdata, we release a completely refactored collector for collecting real-time metrics from Unbound
|
|
servers and displaying them in Netdata dashboards.
|
|
|
|
Unbound runs on FreeBSD, OpenBSD, NetBSD, macOS, Linux, and Windows, and supports DNS-over-TLS, which ensures that DNS
|
|
queries and answers are all encrypted with TLS. In theory, that should reduce the risk of eavesdropping or
|
|
man-in-the-middle attacks when communicating to DNS servers.
|
|
|
|
This tutorial will show you how to collect dozens of essential metrics from your Unbound servers with minimal
|
|
configuration.
|
|
|
|
## Set up your Unbound installation
|
|
|
|
As with all data sources, Netdata can auto-detect Unbound servers if you installed them using the standard installation
|
|
procedure.
|
|
|
|
Regardless of whether you're connecting to a local or remote Unbound server, you need to be able to access the server's
|
|
`remote-control` interface via an IP address, FQDN, or Unix socket.
|
|
|
|
To set up the `remote-control` interface, you can use `unbound-control`. First, run `unbound-control-setup` to generate
|
|
the TLS key files that will encrypt connections to the remote interface. Then add the following to the end of your
|
|
`unbound.conf` configuration file. See the [Unbound
|
|
documentation](https://nlnetlabs.nl/documentation/unbound/howto-setup/#setup-remote-control) for more details on using
|
|
`unbound-control`, such as how to handle situations when Unbound is run under a unique user.
|
|
|
|
```conf
|
|
# enable remote-control
|
|
remote-control:
|
|
control-enable: yes
|
|
```
|
|
|
|
Next, make your `unbound.conf`, `unbound_control.key`, and `unbound_control.pem` files readable by Netdata using [access
|
|
control lists](https://wiki.archlinux.org/index.php/Access_Control_Lists) (ACL).
|
|
|
|
```bash
|
|
sudo setfacl -m user:netdata:r unbound.conf
|
|
sudo setfacl -m user:netdata:r unbound_control.key
|
|
sudo setfacl -m user:netdata:r unbound_control.pem
|
|
```
|
|
|
|
Finally, take note whether you're using Unbound in _cumulative_ or _non-cumulative_ mode. This will become relevant when
|
|
configuring the collector.
|
|
|
|
## Configure the Unbound collector
|
|
|
|
You may not need to do any more configuration to have Netdata collect your Unbound metrics.
|
|
|
|
If you followed the steps above to enable `remote-control` and make your Unbound files readable by Netdata, that should
|
|
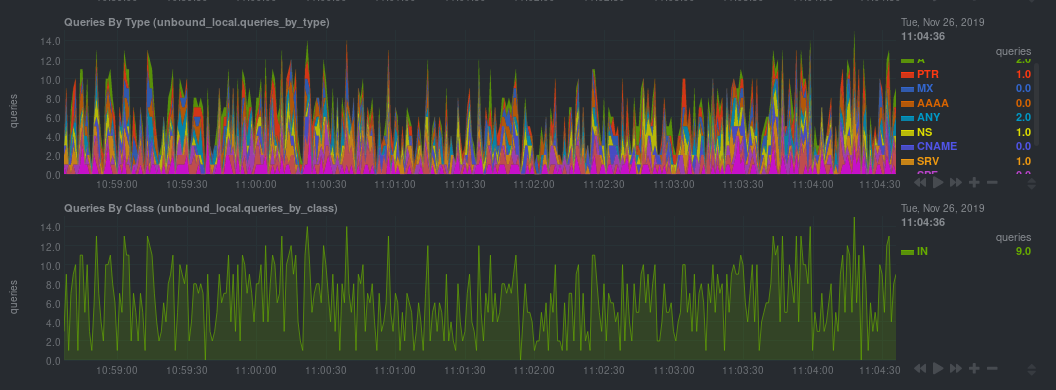
be enough. Restart Netdata with `service netdata restart`, or the appropriate method for your system. You should see
|
|
Unbound metrics in your Netdata dashboard!
|
|
|
|
|
|
|
|
If that failed, you will need to manually configure `unbound.conf`. See the next section for details.
|
|
|
|
### Manual setup for a local Unbound server
|
|
|
|
To configure Netdata's Unbound collector module, navigate to your Netdata configuration directory (typically at
|
|
`/etc/netdata/`) and use `edit-config` to initialize and edit your Unbound configuration file.
|
|
|
|
```bash
|
|
cd /etc/netdata/ # Replace with your Netdata configuration directory, if not /etc/netdata/
|
|
sudo ./edit-config go.d/unbound.conf
|
|
```
|
|
|
|
The file contains all the global and job-related parameters. The `name` setting is required, and two Unbound servers
|
|
can't have the same name.
|
|
|
|
> It is important you know whether your Unbound server is running in cumulative or non-cumulative mode, as a conflict
|
|
> between modes will create incorrect charts.
|
|
|
|
Here are two examples for local Unbound servers, which may work based on your unique setup:
|
|
|
|
```yaml
|
|
jobs:
|
|
- name: local
|
|
address: 127.0.0.1:8953
|
|
cumulative: no
|
|
use_tls: yes
|
|
tls_skip_verify: yes
|
|
tls_cert: /path/to/unbound_control.pem
|
|
tls_key: /path/to/unbound_control.key
|
|
|
|
- name: local
|
|
address: 127.0.0.1:8953
|
|
cumulative: yes
|
|
use_tls: no
|
|
```
|
|
|
|
Netdata will attempt to read `unbound.conf` to get the appropriate `address`, `cumulative`, `use_tls`, `tls_cert`, and
|
|
`tls_key` parameters.
|
|
|
|
Restart Netdata with `service netdata restart`, or the appropriate method for your system.
|
|
|
|
### Manual setup for a remote Unbound server
|
|
|
|
Collecting metrics from remote Unbound servers requires manual configuration. There are too many possibilities to cover
|
|
all remote connections here, but the [default `unbound.conf`
|
|
file](https://github.com/netdata/go.d.plugin/blob/master/config/go.d/unbound.conf) contains a few useful examples:
|
|
|
|
```yaml
|
|
jobs:
|
|
- name: remote
|
|
address: 203.0.113.10:8953
|
|
use_tls: no
|
|
|
|
- name: remote_cumulative
|
|
address: 203.0.113.11:8953
|
|
use_tls: no
|
|
cumulative: yes
|
|
|
|
- name: remote
|
|
address: 203.0.113.10:8953
|
|
cumulative: yes
|
|
use_tls: yes
|
|
tls_cert: /etc/unbound/unbound_control.pem
|
|
tls_key: /etc/unbound/unbound_control.key
|
|
```
|
|
|
|
To see all the available options, see the default [unbound.conf
|
|
file](https://github.com/netdata/go.d.plugin/blob/master/config/go.d/unbound.conf).
|
|
|
|
## What's next?
|
|
|
|
Now that you're collecting metrics from your Unbound servers, let us know how it's working for you! There's always room
|
|
for improvement or refinement based on real-world use cases. Feel free to [file an
|
|
issue](https://github.com/netdata/netdata/issues/new?labels=bug%2C+needs+triage&template=bug_report.md) with your
|
|
thoughts.
|
|
|
|
[](<>)
|